How To Draw A Moose – 7 Simple Steps To Create A Cute Moose Drawing
Creating a Cute Moose Drawing In Seven Easy Steps
In our today’s tutorial, you have a chance to learn how to get a complete moose drawing. We give specific instructions and illustrations; your task is to follow us and make a moose. There are seven steps equivalent to seven tasks you need to complete. This is not an easy job, but it’s not too difficult either. You need to stay focused from start to finish and complete this exciting mission. Don’t worry if you are a beginner to learn to draw because we have arranged this tutorial from easy to difficult; you will do them easily. You can enjoy this drawing activity in your free time after the hard-working hours; you will get a great time and feel your life better because you can temporarily forget the worries and stress of life when you focus on learning to make a moose drawing.
How To Draw A Moose – Let’s Get Started!

Moose is an animal that is not too big, but it impresses us with its cute pair of antlers. Because they are unique, they often contribute their images to beautiful paintings. And today, you will learn how to draw a moose with us, and I hope you like this drawing tutorial. First of all, you have to prepare some tools to learn to draw, such as A4 paper, pencils, pens, and erasers, …then you will proceed to draw moose with a pencil and a4 paper. You will use a pencil to sketch the moose with the first strokes; then, you will erase the wrong lines and continue to draw your moose until you are done. Finally, you choose the right color to color the moose. Isn’t it interesting that at each step, we also have illustrations to make the task easier for you? Along with this instruction, we provide the moose coloring pages to practice your drawing and coloring skill. Now let’s dive into seven steps on how to draw a moose.
Step 1 – Draw A Moose Head

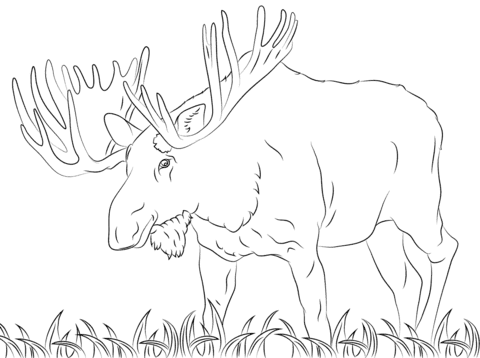
To start drawing a moose, you will draw its head for this first step. Like drawing a goat, the moose’s head will have a pair of antlers, eyes, and ears look very cute. You will use curved lines to draw eyes and ears for moose. It’s also quite complicated for this first step, so take a close look at our reference and follow along. That’s all there is to it with this step, and you’re not ready for step 2!
Step 2 – Draw A Body Part And A Front Leg For Moose

In this step, you will use a long curved line to draw the moose’s back; then, you will draw two short parallel curves representing the moose’s legs. Don’t forget to paint the moose’s nails, too; they almost look like horseshoes, and there will be a highlight between the legs, the moose’s knee, as you see in our reference image.
Step 3 – Draw More A Front Leg For Moose

Similar to drawing a front leg in step 2, you will use two short parallel curved lines to draw a second front leg for moose, then you will draw a nail for moose as horseshoes. Pretty simple for you, too; you can get it done in a few minutes before moving to the fourth step.
Step 4 – Draw Moose’s Belly And A Hind Leg

Your task in this step of your moose drawing is to show its belly and hind leg. You continue to use curves to complete the job in this part; it’s not too difficult for you; you can look at our drawing and follow to finish the mission here. You will continue your drawing work in the fifth step.
Step 5 – Add One More Leg For Moose

You’ve drawn one back leg for your moose drawing so far, and in this step, you will be adding one more leg. Like you drew the other legs, you draw the top of the leg so the moose’s thighs will get bigger then the legs will get smaller. At the end of the leg, you will draw its hooves, almost like a horseshoe, as you see in our illustration.
Step 6 – Draw The Moose Tail

It’s time to draw the tail of your moose drawing. Its tail is created by a curved line. You draw the tail for moose drooping, as you see in our example. So, you finish off your drawing here on how to draw a moose and have the last step for coloring.
Step 7 – Color Your Moose

It’s almost time to color in your picture before you must choose the suitable colors and the way to mix colors. In this step, you can show your painting skill and your favorite color for your image. We use light yellow and brown to make coloring for our moose drawing. If you like, you can take the same colors as us.
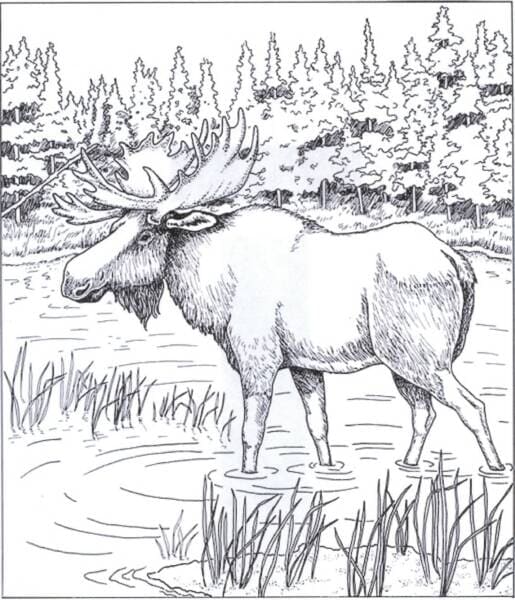
Your Moose Drawing Is Completed!
Right now, you know how to draw a moose with us through seven steps. This mission is very interesting and suitable for everyone from children to adults. A suitable entertainment channel is very necessary for everyone. And you too, when having a suitable entertainment channel, you can work and entertain your way, why not? You will work more comfortably with suitable relaxation time and your life is better. On our website Coloringcool.com, you can enjoy some other animals such as horse drawing, antelope drawing, camel drawing,…These animal drawing tutorials are similar to moose drawing tutorials. When you finish your work, you can show the bow on Facebook or Pinterest so your friends can see your skill and your talent for drawing and coloring. I hope you will get success in this guide and make a nice moose with us. You can come to our site each day because we update our education products daily. Have a great time with moose drawing!