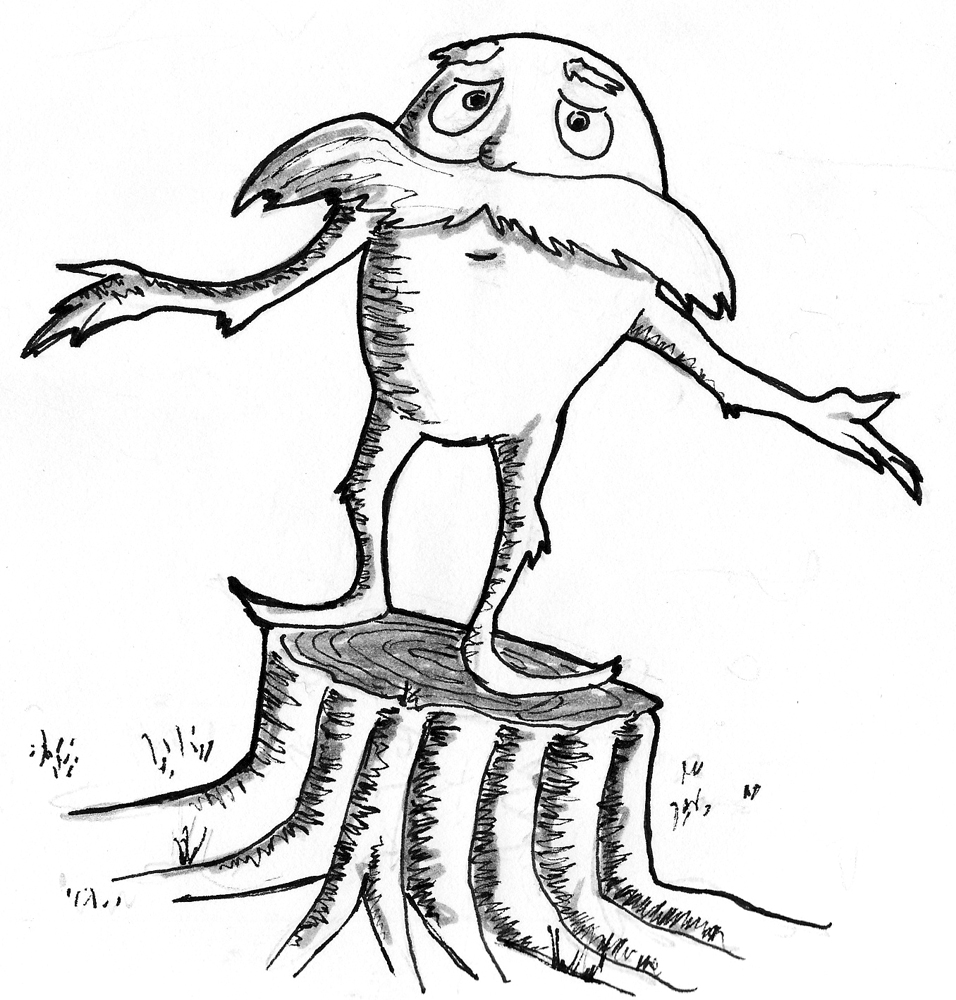
Lorax Drawing Is Complete In 6 Easy Steps
Creating The Wonderful Lorax drawing in just 6 easy steps
Learn how to draw the Lorax with our super easy to follow step by step Lorax drawing tutorial. You will follow our instructions and make the complete Lorax. You know that the Lorax appears in the Dr. Seuss book “The Lorax”. It is a book about the environmental issues that the greedy Once-ler is causing by cutting down all of the Truffula trees. This book illustrates how back corporate greed is and what sort of bad things can happen to the environment and nature if a CEO is too greedy and only cares about money. This mission is not easy but not too difficult, you will concentrate your mind, passion, and time to finish the task in each step until finish your work. Our drawing tutorial will guide you thru the easy steps of drawing The Lorax. Drawing is an interesting and useful entertainment channel for everyone from children to adults; you can enjoy it in your free time after the hard-working hours. Along with the tutorial, we have also included a couple of free Loax coloring pages that you can print off and give to your kids to color!
How To Draw The Lorax – Let’s Get Started!

Lorax character has a lovely appearance, so many people like him and want to get a drawing of Lorax, but not everyone can afford to do that. Fortunately, today we give detailed instructions to help you know how to draw The Lorax. It would help if you prepared a pencil, eraser, colored pencils, and drawing paper before drawing. You will use the pencil to draw on paper, and you can erase your mistakes. So, don’t be afraid to draw; please draw in the most comfortable way. You will realize your task from easy to difficult until finish your character. Here we will guide the Lorax drawing in the six steps. Some steps will require you to erase lines drawn in previous steps. This entertainment activity is good for your kids; they can avoid using technical devices such as television, smartphone, and tablets. They are not good for their eyes and evolution. If you are a parent, you can join un this activity with your kids. This allows you to get to know your kids better. Why not? It is free on our site, and you can come here anywhere and anytime. Now, let’s get started drawing The Lorax with us!
Step 1 – Draw The Lorax’s Eyes

In this first step for Lorax drawing. You will draw two ovals for Lorax’s eyes; you will continue drawing the dots inside each one for pupils. Your task in this step is as simple as that, you complete it and quickly move on to the next step.
Step 2 – Draw The Lorax’s Face Details

The Lorax has a huge Mustache; you will show that in this step. You use short and long curved lines to draw a mustache for Lorax. On the mustache, you draw a small nose for a character. Then you draw two curved lines then connect them at the bottom with a flat line on the eyes to make the eyebrows. So you have completed all the details for the character’s face. You can move to the third step 3, and continue your drawing.
Step 3 – Draw An Arm And A Leg for The Lorax

Use a straight line to pull from the face of the character, then bend it to form an elbow, draw again from the elbow to the hand, and then use a curved line to represent a part of the finger. You continue the work in this part by extending the line to the bottom to form the character’s feet. You use some small curved lines to show the feet’s personalities.
Step 4 – Draw The Rest Of The Leg For Lorax

The finishing leg depicts short legs with a smooth line. You complete the legs mission in this step. Exactly the same as drawing the legs in step 4, you use straight and curved lines for the task in this step. You also use a long curved line from face to feet to show the shoulder and belly of your character. You can stop working in this step and move to step 5.
Step 5 – Finish Your Drawing Mision

Finish your drawing mission for Lorax by adding the rest of the arm. Very simple to realize this drawing arm task as step 3. You use a straight to turn at the elbow, then draw again from the elbow to the hand, and then use a curved line to represent a part of the finger. So, you’ve finished drawing Lorax, and you can add some small lines for decoration details. Now, you erase all guidelines.
Step 6 – Color Lorax

Finally, the most exciting part is filling in the colors for your awesome drawing! This is where you can show off your artistic skills and ability to mix and match various shades. You will choose the suitable color for your character, Lorax. It’s that simple, choose your favorite color or the color we select. Here, we take brown for the body, yellow for the mustache and eyebrows, and white and black for the eyes. To realize the mission for Lorax, you will spend about 30 minutes. This time is enough for you to entertain, make your mind rest, and work better for the next time. Once you create the complete Lorax, you can move to Lorax coloring pages to enjoy images related to Lorax. We update hundreds of coloring pages here, and you will enjoy them for free. I hope you get a great time!
Use the video and step-by-step instructions below to learn how to draw The Lorax. Thanks for visiting! Subscribe to the How To Draw YouTube Channel for our new tutorial.