8 Simple Steps To Create A Cute Robot Drawing – How To Draw A Robot
Creating A Versatile Robot Drawing In Eight Easy Steps
Here, you get a fun time creating a robot drawing with us in eight simple steps.
We will give specific instructions, so you don’t have to get confused in drawing this robot.
In each step, we also provide illustrations to help you finish your mission easily.
There are eight steps equivalent to eight missions that you complete to get a complete robot.
In each mission, you will have your own difficulties and interesting things; let’s explore them!.
You do not have much time, but you need to focus on completing the task as soon as possible.
We hope our tutorial is easy to understand and helps you have a good time learning to draw.
How To Draw A Robot – Let’s Get Started!

It would be great if we always had a robot to help us with housework such as cleaning, cooking, …we would be happier.
With the current development of science and technology, we can own robots to help us do simple things.
Today, you will have a chance to learn to draw a robot with us. And you also get more information about this friend.
Before starting to draw, you get supplies such as a pen, pencil, colors, ruler, eraser, marker,…
You will proceed to draw the robot with paper and pencil because that way, you will erase the wrong lines and then draw correctly until you are done.
A fun quest for you and everyone else, but it’s also fun to enjoy in your free time.
With this robot drawing guide, you can enjoy robot coloring pages free on our website to practice your drawing and coloring skills.
Now, let’s go into eight steps on how to draw a robot with us!
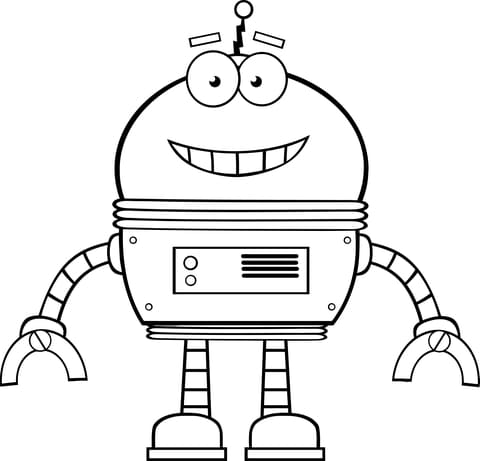
Step 1 – Draw Face And Head For Robot

Begin to draw a robot; you create a rectangle to make a face and head outline. You draw two eyes with some circles and ovals, as you see in our reference.
You can add a line to decorate its face and make it more realistic.
Those are all tasks you have to complete in the first step of our guide on how to draw a robot, and now you can move to the second step.
Step 2 – Draw The Robot’s Body

You draw more a rectangle for the body of the robot. But before drawing its body, you must draw two straight lines for the neck.
In drawing robots, most of the time, you will use straight lines to show your character. So, you can use a ruler for support.
Once you’re happy with your image; you can continue your
mission in step 3.
Step 3 – Draw The First Arm For Robot

It’s time to draw an arm of your robot. It is created by some lines and a circle to create the elbow.
The end is the robot’s hand with two big fingers showing that your robot can do some simple things. You can observe our illustration that will show you what it should look like.
Step 4 – Draw The Other Arm

Similar to step 3, for this step of our guide on how to draw a robot, you must draw the second arm.
You use parallel lines to make the arms and circles and ovals to make the elbows. It’s not too difficult for you; stay focused and follow us.
When you finish off the task for the robot’s arms, you will draw the rest of the details for your character in the next steps.
Step 5 – Draw The First Leg Of Your Robot

You continue your drawing of the robot with the first leg.
The robot’s legs are composed of two parallel lines and a curved end to show the foot.
Your task in this step is just that, simple, and you just need some minutes to finish.
Step 6 – Draw The Other Leg

If, in step 5, you draw the left leg for your robot, your task in this step is to draw the right leg.
You also your two parallel straight lines to draw this leg. You finish your task here with a curved line for the foot, as you see in our reference image.
Step 7 – Decorate Your Robot

You complete your robot with some lines to create the decoration details for your character robot.
There are quite a few details you need to draw in this step, a heart in front of the stomach, two antennas on the head, and overlapping lines to form two ears for the robot; you can add some curves on the robot’s limbs to make them more beautiful.
Ao, you finish all tasks of your drawing task, and you have the final step for coloring.
Step 8 – Color Your Robot

You can choose one color or multicolors for your robot.
We can’t limit the color, so you are completely free in this step. You can use any color you like.
We use some color for our robot drawing. We use green for the face, antennae, and body, red for the heart, black for the eyes, and some white and pink for some places on the robot.
Your Robot Drawing Is Complete!
You get a perfect robot through eight steps on how to draw a robot. Drawing a robot is not an easy task, but with our drawing guide, I hope you will be happy with your result.
On our website Coloringcool.com, you can other similar drawing guides such as gir drawing which is free for you.
Proper entertainment will make us feel better in life. If you only have work and relationships, your life will definitely be boring. So you need to choose for yourself a suitable entertainment channel. Realized that we always provide educational products daily on our site at drawing, blogs, and coloring pages.
Hopefully, with more than 30 minutes of drawing a robot, you will have a great time, and you will come back to us to enjoy more drawing guides!