Teapot Drawing Is Created In 7 Easy Steps
Creating a nice teapot drawing in just 7 easy steps
You will follow our guide to create a complete teapot drawing. This easy tutorial teaches you how to draw a teapot in seven steps using simple illustrated images along with quick explanations. This is not a simple task, but it is not too difficult; you can finish all tasks in seven steps one by one. you will have to complete each task at a time, there will be seven missions for you, and we have updated seven reference images equivalent to 7 steps to make the task easier for you. What a task for you; if you are a parent, please encourage your children to participate in learning how to draw a teapot, through which children will also learn many things about the teapot, such as the structure of the teapot, how to brew and drink tea. These will help your child gain more skills in life. With our simple seven steps, you will create a perfect teapot in your creative style. More, you get a comfortable time with us. No matter who you are or what you do, you need the right leisure time to balance your life.
How To Draw A Teapot – Let’s Get Started!

The teapot is a familiar item in every family, it is used to make and drink tea. Drawing a beautiful teapot requires many drawing techniques, but with our detailed instructions through these seven steps, you will be able to draw a teapot, whether you are a beginner or an expert in drawing. In the field of drawing, we will also help you complete this task. Before you start to learn to draw, you need to prepare a few things like a pencil, pen, colors, and paper; then you start to draw with a pencil the fuzzy lines if you draw it wrong, you can easily redraw it, and If the stroke is satisfactory, you can highlight it and use it to create the first strokes. We have given instructions from easy to difficult, from starting to draw the teapot to the final touches to decorate the teapot. Finally, you will choose the color for the teapot to make your teapot more beautiful and unique. Along with this tutorial, you also can enjoy Teapot coloring pages on our website, we update many images related to Teapot and help you to realize your teapot more easily. Why not? Let’s get started and you will understand the details in the following 7 steps.
Step 1 – Draw The Teapot Body Outline

Start the task on how to draw a teapot; you will use the curved lines to draw the teapot body outline. You will start from top to bottom, around the bottom, and circle up to form a teapot body outline. As our reference image is very simple for you, you just need one complete curve or several curves joined together, depending on your drawing style. Let’s finish this task in step 1 and move to step 2.
Step 2 – Draw The Top For Teapot

Your task in this step of your teapot is to draw the top. As you can see in our illustration, you only need to draw two seemingly parallel curves that form the top of the tea to cover the lid and will be drawn in the next step.
Step 3 – Draw The Teapot Lid

In the top part of the teapot, we will draw the lid. In general, the lid is slightly curved, and there is a flat area on the top that contains the knob of the teapot. Here you draw the little button for your teapot; simply right, you will finish the work of this step and go to step 4.
Step 4 – Draw The Teapot Handle

You will begin to draw the handle for the teapot; it is composed of 2 parallel arcs on the right side of the teapot. So you will use two parallel curves to form the handle for the teapot, in this case, for your teapot. If you have finished it, then hurry to the next step, 5, to continue working on your drawing.
Step 5 – Draw The Teapot Snout

Opposite the handle will be the snout of the teapot, the snout is structured like a wavy shape; if you find this task difficult, please look at our reference picture and follow it. You can do it, calm down and finish it; only a decoration section in step 6 is left for you to complete the drawing
Step 6 – Finish Off Teapot Drawing

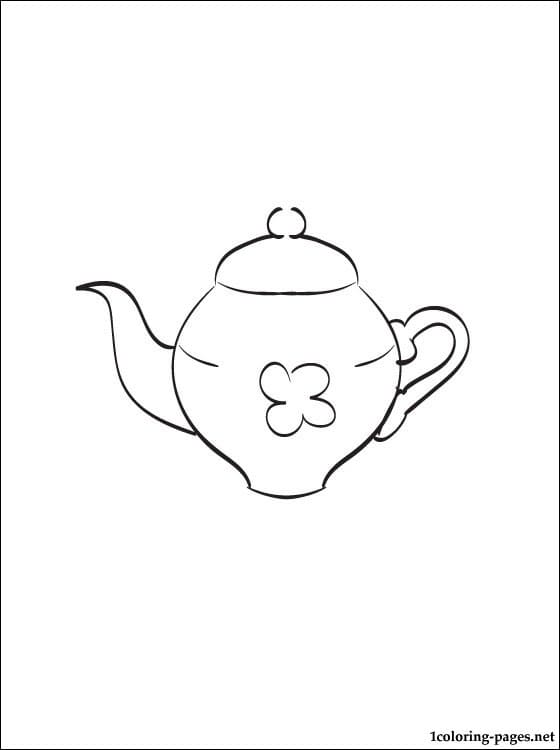
You will finish the task for the teapot with the decor details; you can add flowers or any other decorative image to make your teapot more unique and personal. Here, we use the leaves and flowers to decorate the teapot. Don’t you think the stars are beautiful? Let’s make your products more beautiful than ours.
Step 7 – Color Your Teapot

Very simple task for you in this step; you just choose the suitable color for your product, a teapot. You can take any color you like and make coloring for your drawing. We chose pink for the teapot, green and yellow for the flower, and the snout and handle are colored green as well. So, you finish your drawing and coloring mission on how to draw a teapot.
Your Teapot Drawing Is Complete
You finished all seven-step of the guide on how to draw a teapot. It is amusing and interesting. If you are a parent, you can join this activity with your kids. They will surely like it. Drawing, in general, and teapot drawing, in particular, will help your child develop more skills, such as communication skills, pen skills, and painting skills. More your kids can avoid using technical devices like television. tablets, smartphones. They are not good for their eyes and evolution. With our 7 easy steps for instructions, you will know how to draw a teapot with your fun time; you can refer to our drawing tutorial and coloring pages on our site, such as Teapot coloring pages, and relax in your free time and you will work more effectively. They are free, and we update them daily.